Lovely and Yummy Oreo Truffles for Spring


I love to make beautiful treats to display on the table for holidays. And I love it when the recipes are simple enough that my little niece can help me make them. And I love it even more when the beautiful treats are also delicious! This recipe for Lovely and Yummy Oreo Truffles for Spring fits all of those categories!

Another nice thing about this recipe is that it doesn’t call for lots of fancy ingredients. You probably don’t keep the yellow candy melts on hand, but they can be ordered from Amazon or picked up at your local Walmart.
And you can pick up the candy eggs on the Easter candy aisle at your local grocery store or order them too. If you like candy Mini Robin Eggs, you may want to use those. Or you might want to use Cadbury Easter Candy Coated Mini Eggs if you like them better.
To make your Oreo truffles, you’ll need these ingredients:
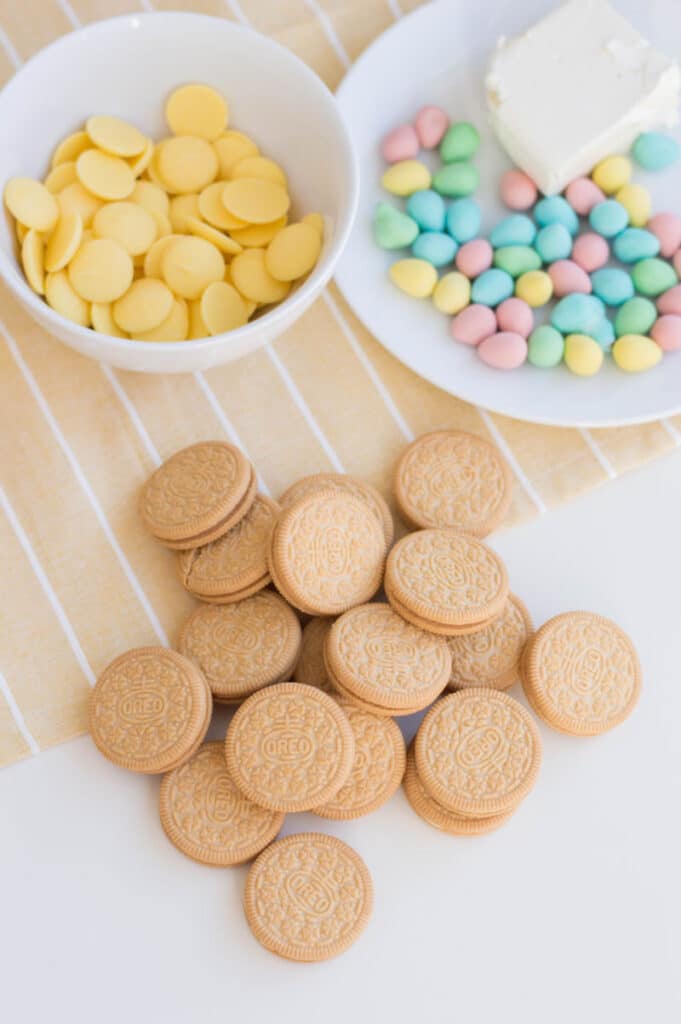
18 vanilla Oreo cookies
4 oz. cream cheese, softened
25-30 candy eggs (Robin Eggs or Cadbury Eggs)
Yields: 8-10 Oreo truffle nests
Then follow these steps:
- Line a baking sheet with wax paper and set aside.
2. Place Oreos in a food processor and pulse until crumbled into fine bits. (You may place a few Oreos at a time in a ziptop bag and let your children smash them with a rolling pin if you like! The pieces won’t be as smooth and uniform, but who cares?)
3. Fold cream cheese and Oreo crumbs together in a large bowl.
4. Roll Oreo and cream cheese mixture into balls, about 1 ½ inches in diameter. Place each one on your lined baking sheet.
5. Use the back of a rounded teaspoon to press an indent in the center of each of your Oreo truffles.
6. Press along the edge of each truffle, to shape it into a nest. The center cavity/indentation should be about 1 inch in diameter.
7. Chill truffles in the refrigerator for 30 minutes.
8. Once time is up, remove truffles from the fridge.
9. Microwave candy melts in 30-second intervals until completely melted.
10. Scoop melted candy into the cavity of each Oreo truffle.
11. Top the truffles off with 2-3 candy eggs each.
12. Chill for an additional 10 minutes. Serve and enjoy!
These lovely and yummy Oreo truffles for spring are a beautiful addition to your table whether you’re celebrating Easter, a spring or summer birthday, the arrival of spring, or Mother’s Day! I hope you have as much fun making them as you have eating them!


Lovely and Yummy Oreo Truffles for Spring
- Yield: 8–10 Oreo truffle nests 1x
Description
These lovely and yummy Oreo truffles for spring are easy to make, and the results are beautiful and delicious!
Ingredients
18 vanilla Oreo cookies
4 oz. cream cheese, softened
¾ cup yellow candy melts
25–30 candy eggs
Instructions
Line a baking sheet with wax paper and set aside.
Place Oreos in a food processor and pulse until crumbled into fine bits.
Fold cream cheese and Oreo crumbs together in a large bowl.
Roll Oreo and cream cheese mixture into spheres, about 1 ½ inches in diameter. Place each one on lined baking sheet.
Use the back of a rounded teaspoon to press an indent in the center of each Oreo truffle.
Press along the edge of each truffle, to shape it into a nest. The center cavity/indentation should be about 1 inch in diameter.
Chill truffles in the refrigerator for 30 minutes.
Once time is up, remove truffles from the fridge.
Microwave candy melts in 30 second intervals until completely melted.
Scoop melted candy into the cavity of each Oreo truffle.
Top the truffles off with 2-3 candy eggs each.
Chill for an additional 10 minutes. Serve and enjoy!