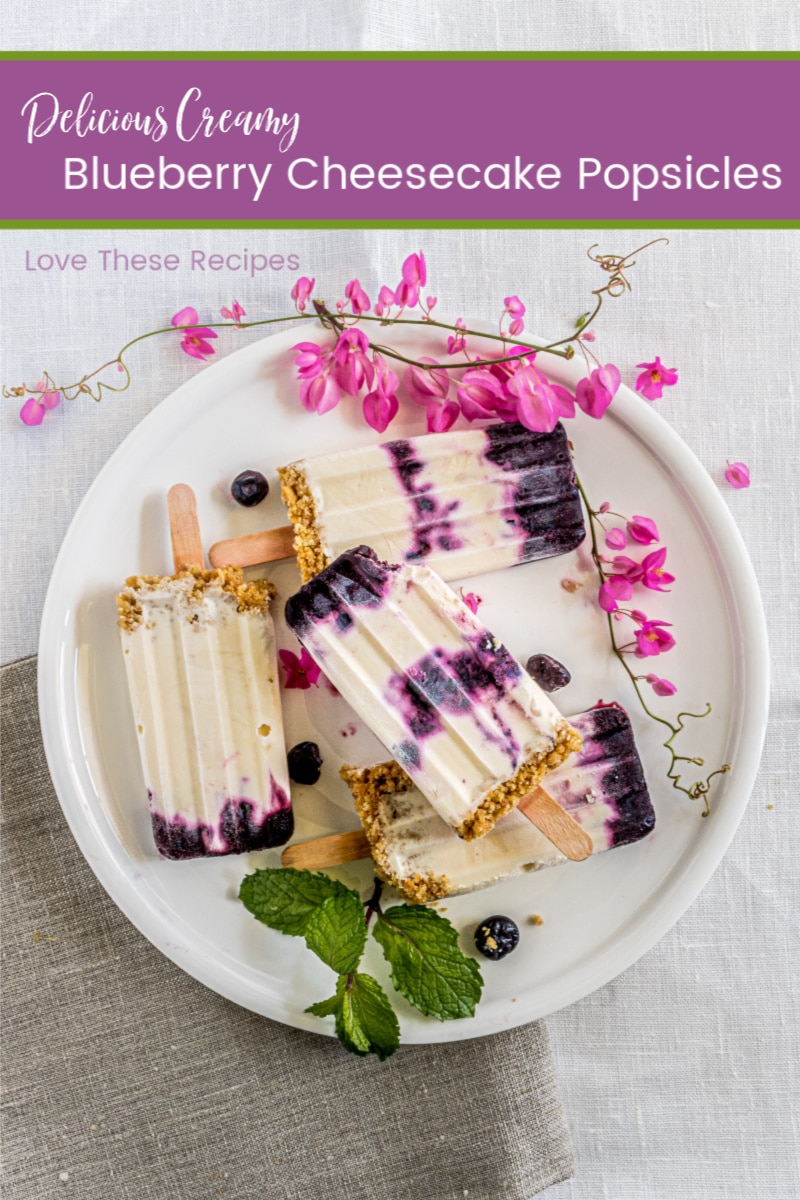
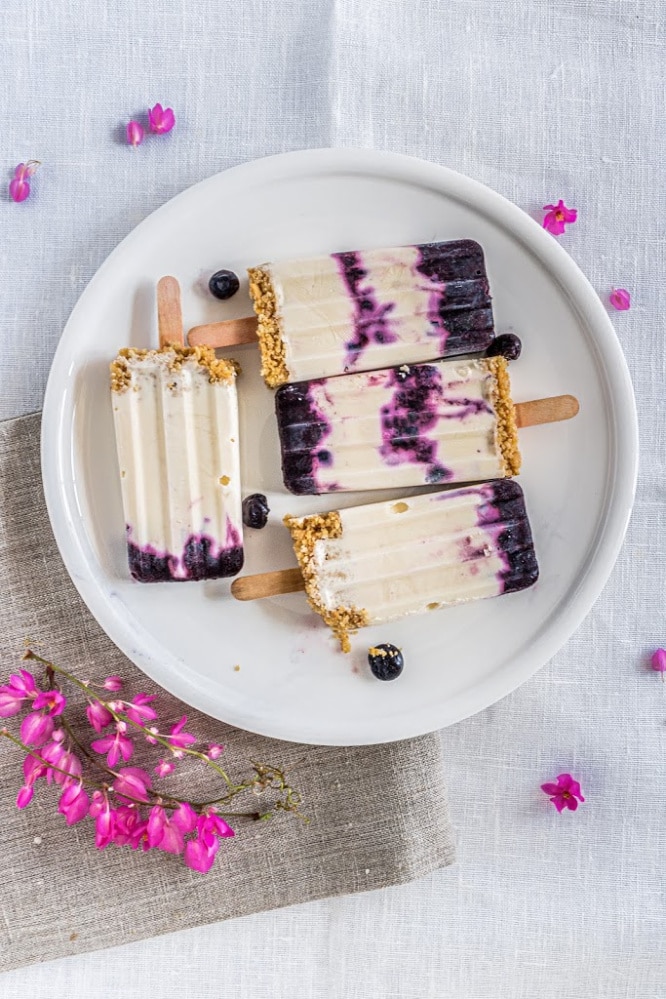
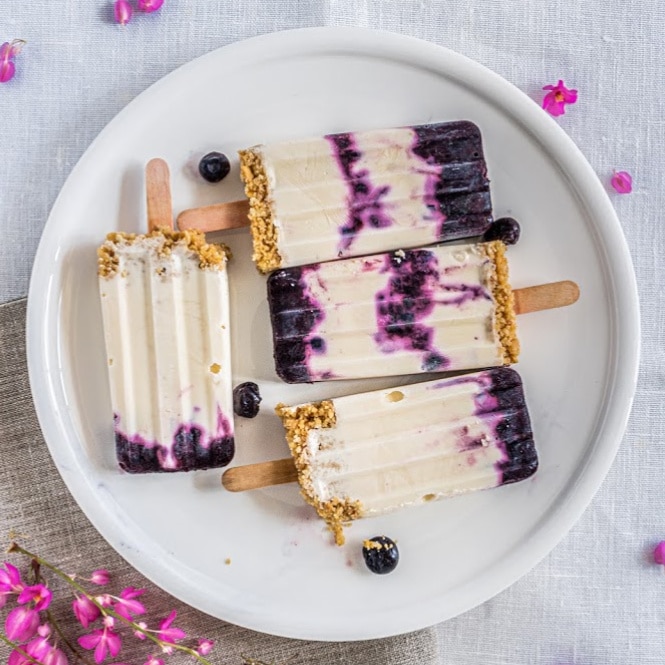
Creamy Refreshing Blueberry Cheesecake Popsicles
Creamy Refreshing Blueberry Cheesecake Popsicles
Every summer my blueberry bushes produce a crop of big juicy blueberries. They are beautiful to look at, and we have lots of fun picking the berries and guessing how many cups of blueberries we’ll get from each bush.
Some of us love to eat the berries straight off the bushes. Others like to eat the berries in pancakes or muffins.
Whether you grow your own blueberries, buy them from a local farmer’s market, or buy them at the grocery store, blueberries are great for not only pancakes and muffins but also for smoothies and even popsicles! And if you put blueberries in your popsicles, that automatically makes them healthy, right?!
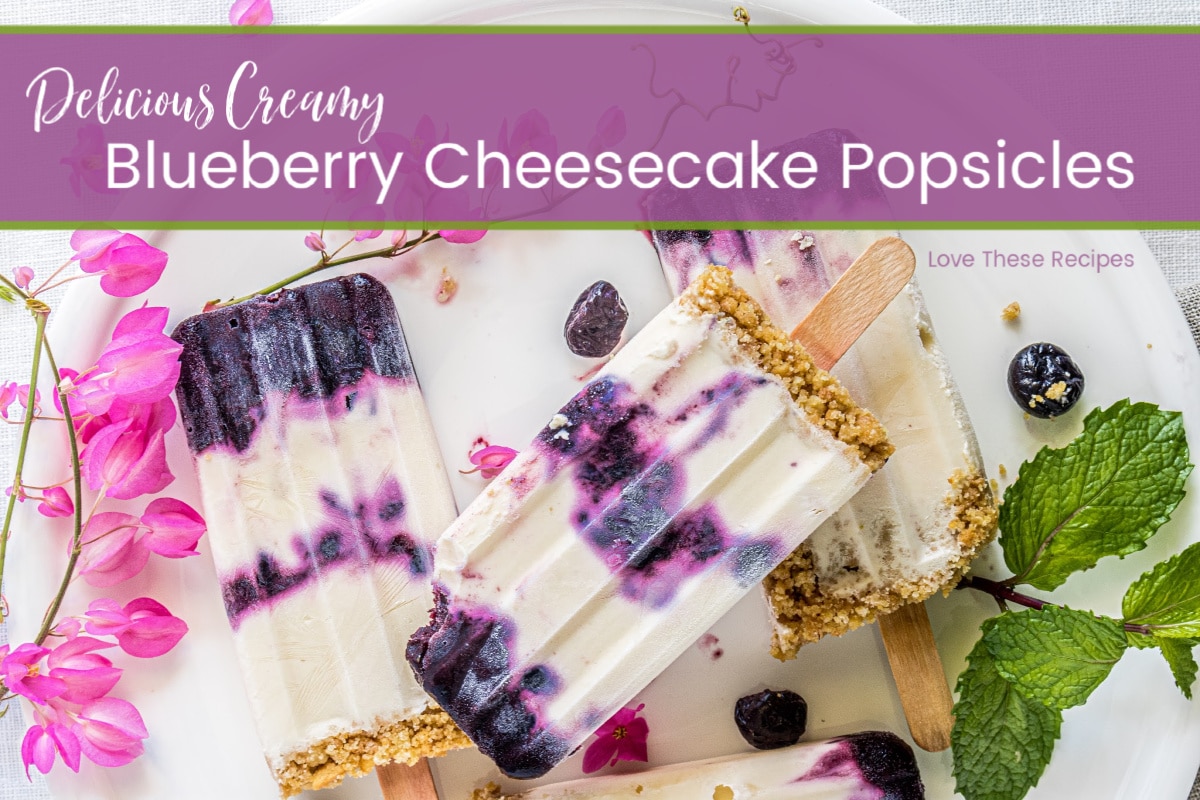
This recipe for creamy refreshing blueberry cheesecake popsicles is just what you need for a snack on a hot summer day! You could even eat one for breakfast or as dessert. No matter how or when you eat them, we truly think you’re going to love this recipe! (To find a printable version of the recipe, scroll to the bottom of this article.)
You probably already have most (or all) of the ingredients you’ll need to make these yummy pops! And for those people who eat gluten free, all you have to do is use gluten free graham crackers (or substitute gf vanilla wafers) for the regular graham crackers!

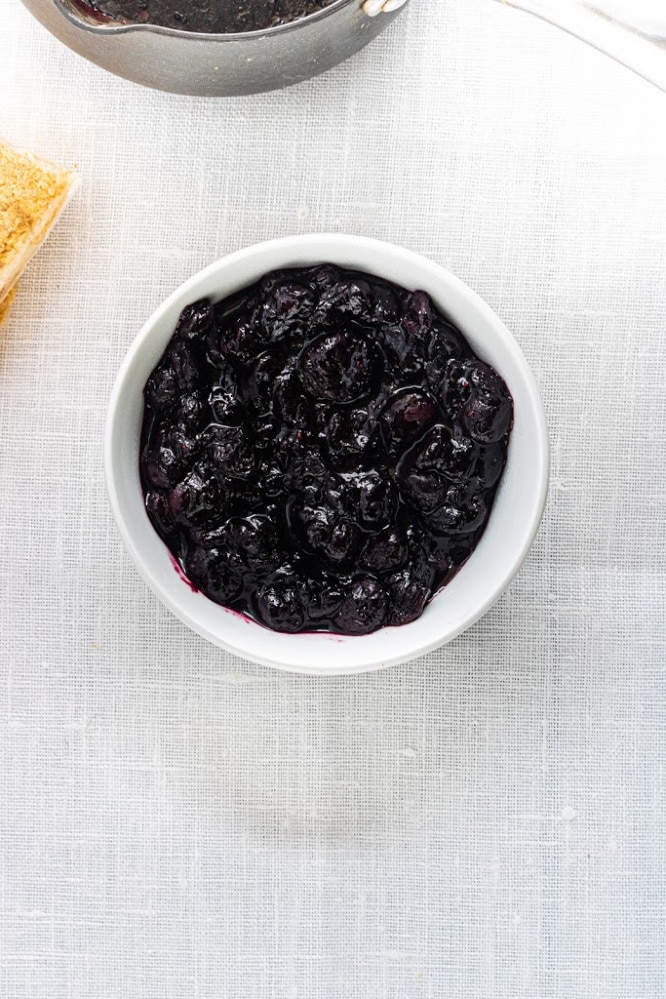
First, you’ll make the blueberry compote. It sounds fancy, but it’s really easy!
If you’re using frozen blueberries, you’ll want to let them thaw at room temperature for at least an hour before you begin. Then drain the blueberries and reserve 2 tablespoons of the liquid to use in the recipe. (If you’re using fresh berries, you’ll simply use water instead.)
Now you’ll put the thawed blueberries, the 2 tablespoons of reserved liquid, and a tablespoon of honey into a small saucepan over medium heat. (If your berries are really sweet, you can skip the honey.) If you’re using fresh berries, you can just add 2 tablespoons of water and a tablespoon of honey. (Just like with the thawed berries, you can skip the honey if your berries are really sweet.)
Cook over medium heat until the blueberries soften–being careful not to let them burn. Once they soften, mash about half of them with a spoon and leave the rest whole.
Once your blueberries are done, they’ll have an almost jam-like consistency. Remove them from the heat and allow them to cool.
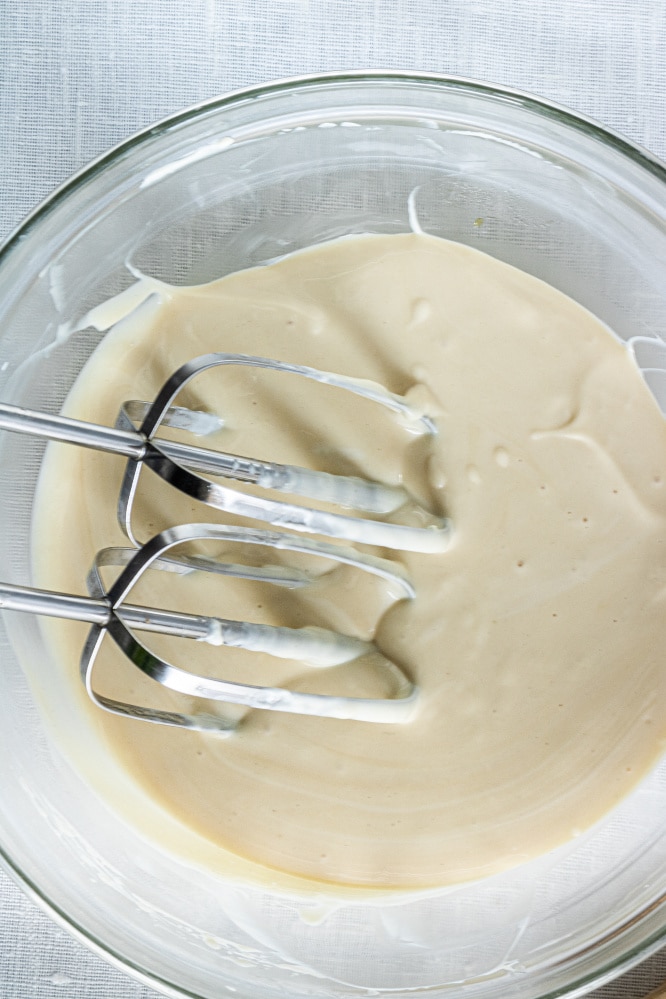
Now you’ll make the cheesecake base. (Sounds delicious, doesn’t it?!)
Be sure to allow your package of cream cheese time to soften at room temperature so it will be easy to mix. Once it is soft, place it in a medium-sized bowl and use a hand whisk to mix until it is creamy and smooth.
Then you’ll add the yogurt, 4 tablespoons of honey, lime juice, and lime zest and slowly whisk until combined. Be sure to scrape down the sides of the bowl now and then during this process. (NOTE: If you don’t like lime, just use lemon juice and lemon zest instead.)
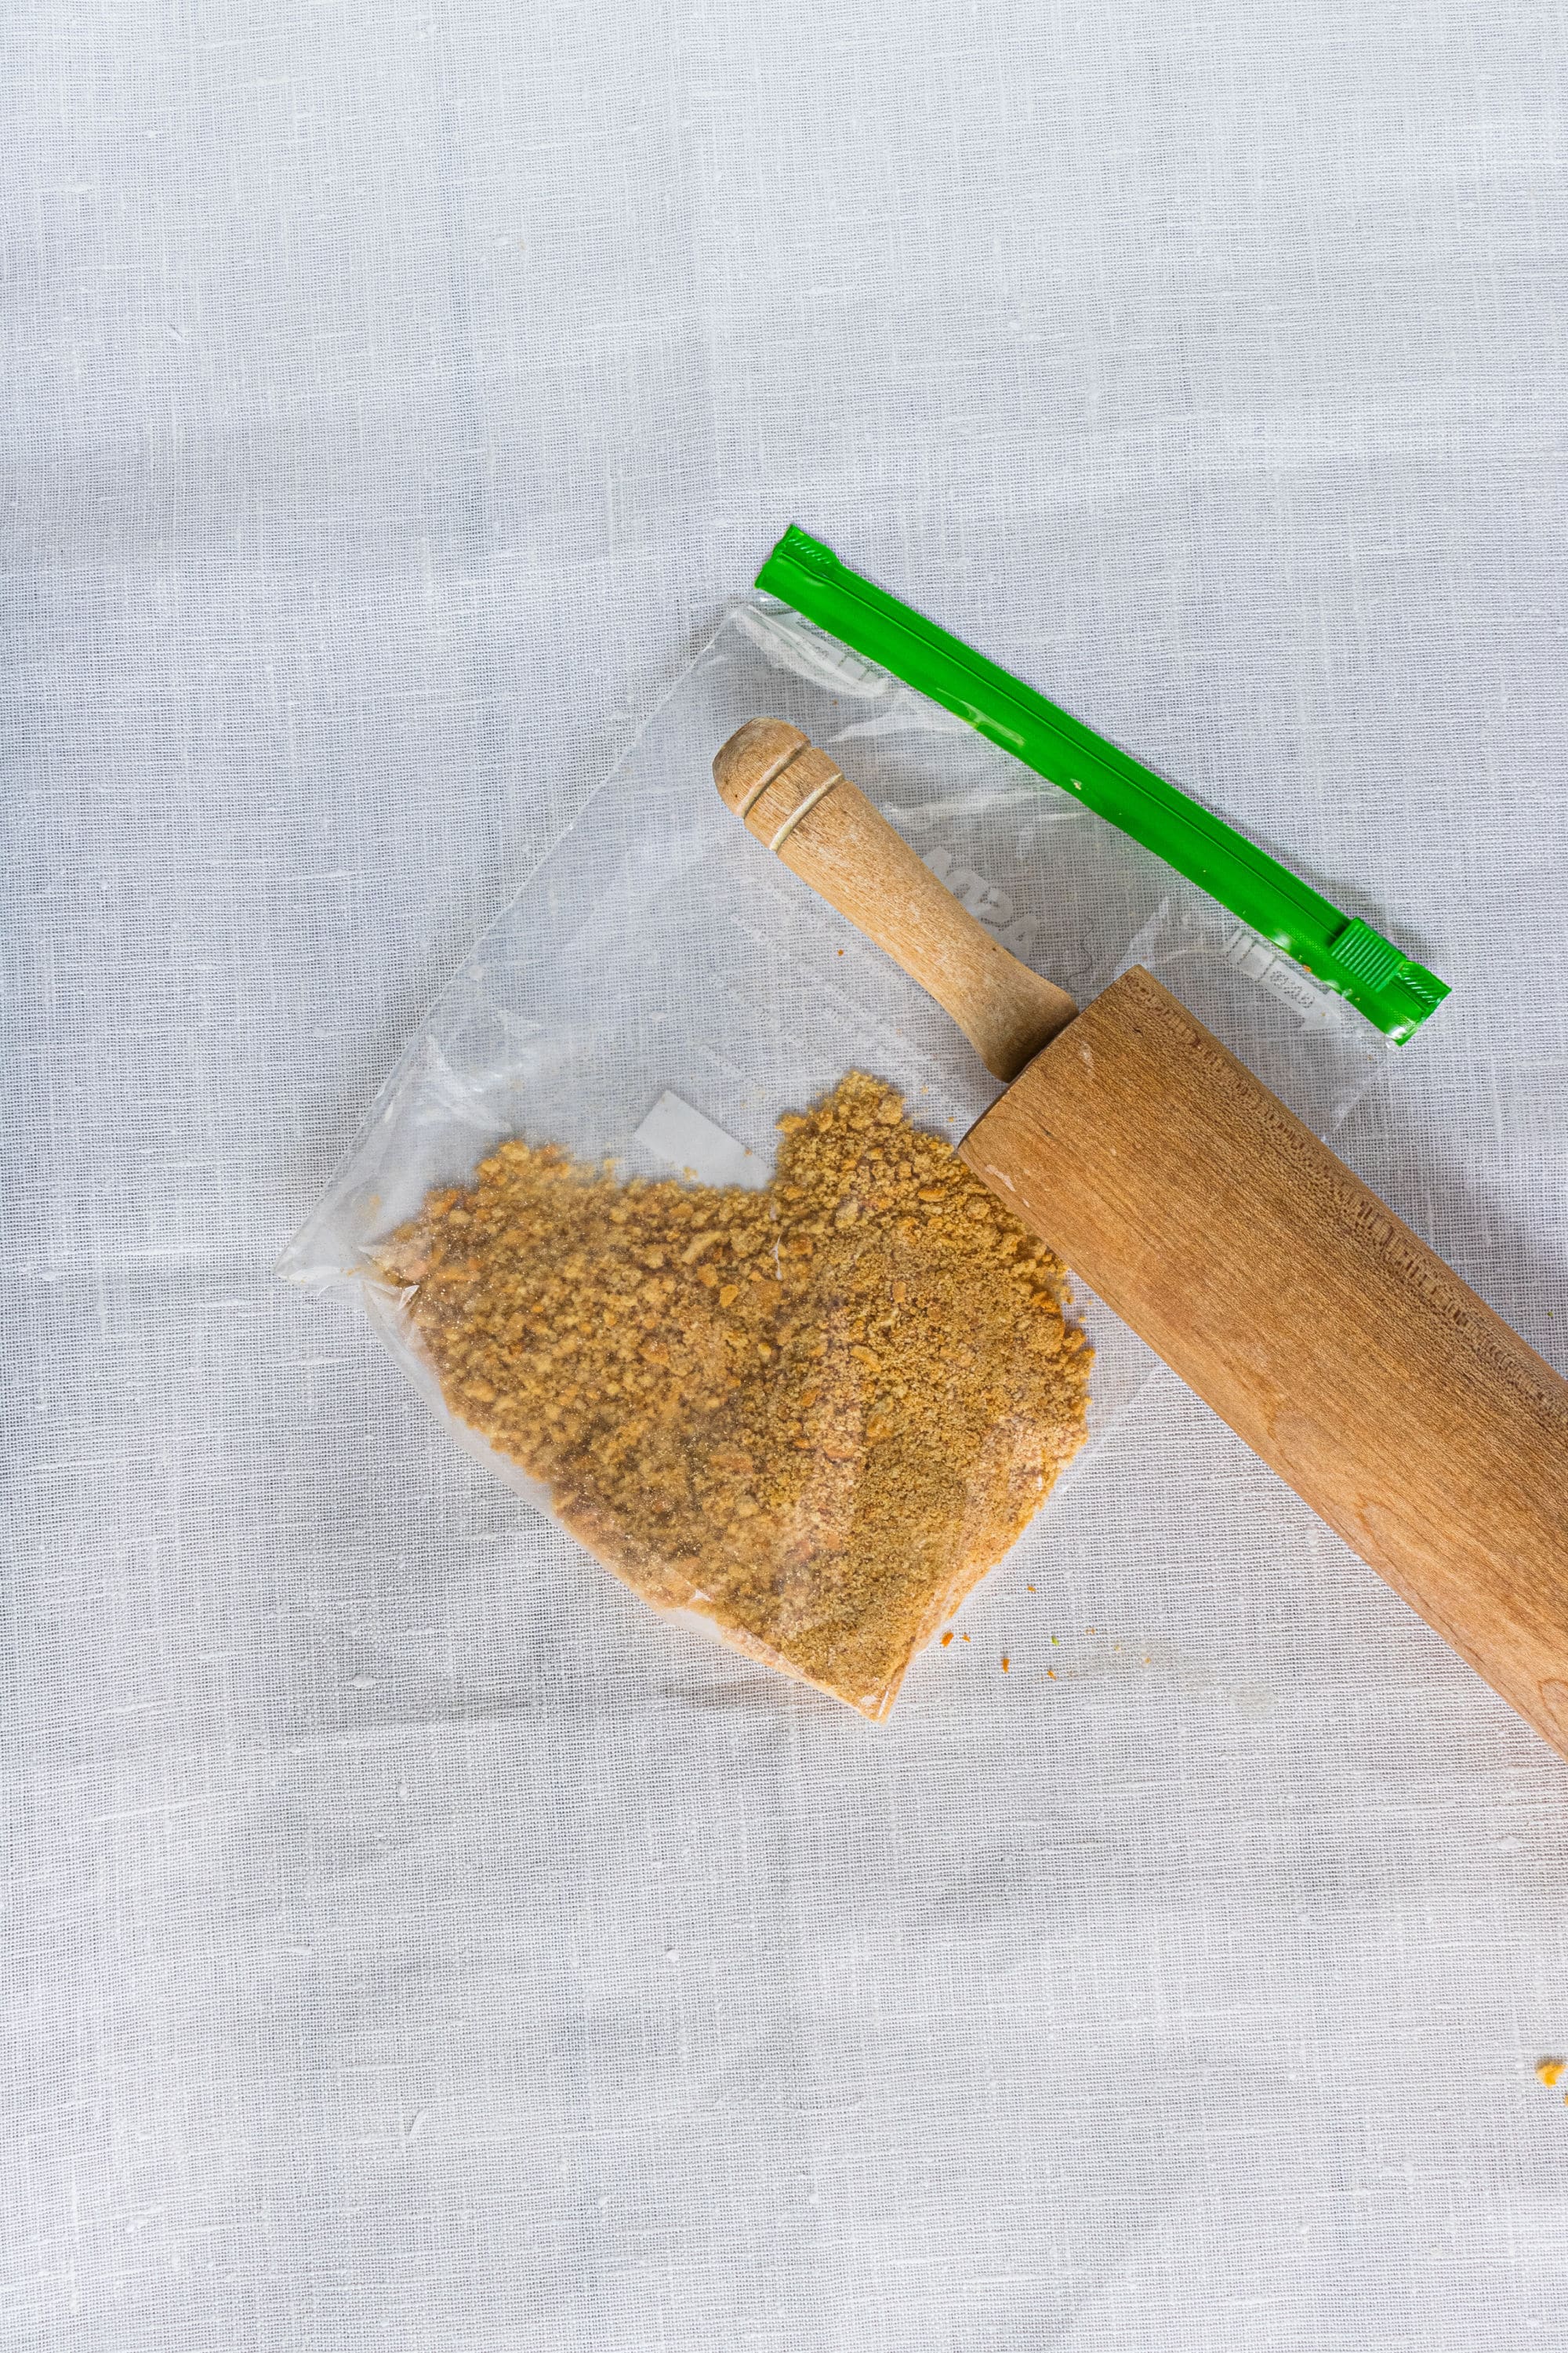
Next, you’ll make the cookie base.
All of these steps are easy, but this one is the easiest. And it’s also a great step to let the kids help with! Simply put the cookies into a zip top bag and crush them with a rolling pin. After the cookies are completely crushed, place them in a small bowl and mix them with the melted butter.
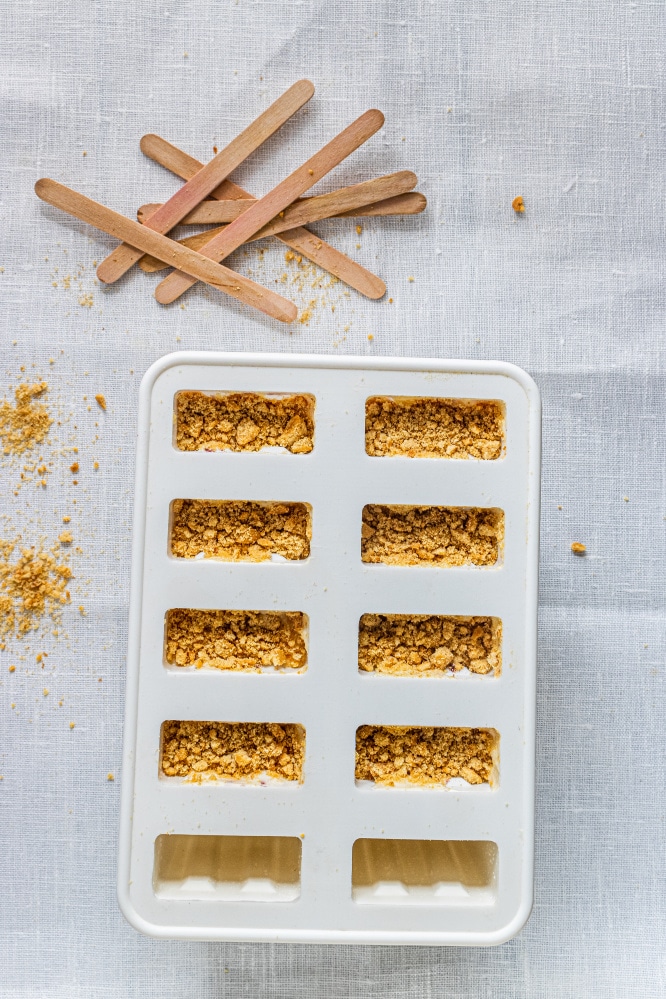
Now for the fun part–assembling your popsicles!
Put some of the blueberry compote into each popsicle mold. Then add the cream cheese mixture until each mold is almost full. Finally, you’ll top each one with the crushed cookie mixture.
Be sure to add the popsicle sticks before you place them in the freezer! Then freeze them for at least 6 hours (preferably overnight if you can wait that long).
To serve, you may need to run warm water over the popsicle molds to make it easier to remove your popsicles.
Creamy Refreshing Blueberry Cheesecake Popsicles
- Yield: 6 to 8 popsicles 1x
Description
These Creamy Refreshing Blueberry Cheesecake Popsicles are perfect for a hot summer day or special occasion.
Ingredients
1 ½ cups blueberries (fresh or frozen)
1 8-ounce package of cream cheese (room temperature)
½ cup Greek yogurt
5 tbsp honey (divided)
1 tsp lime juice (or lemon juice)
½ tsp lime zest (or lemon zest)
6 graham crackers
2 tbsp melted butter
2 tbsp water (if using fresh blueberries)
Instructions
If you’re using frozen blueberries, allow them to thaw at room temperature for at least an hour. Be sure to reserve 2 tablespoons of the liquid to use in the recipe. (If you use fresh blueberries, you’ll simply use 2 tablespoons of water instead.)
Put the berries, 2 tablespoons of liquid, and 1 tablespoon of honey into a small saucepan over medium heat. (If the berries are sweet enough, you don’t have to add the honey.) Cook over medium heat until the berries soften. (Stir often so they don’t burn!) Once they soften, mash about half of them with a spoon and leave the rest whole. Cook until they reach a jam-like consistency. Remove from heat and allow to cool.
Place room-temperature cream cheese into a medium-sized bowl. Use a hand whisk to mix until it is creamy and smooth. Then add yogurt, 4 tablespoons of honey, lime juice (or lemon juice), and lime zest (or lemon zest), and whisk until combined. Be sure to scrape down the sides of the bowl now and then. Set aside.
Place cookies into a zip top bag and crush with a rolling pin. After the cookies are completely crushed, place them in a small bowl and mix with 2 tablespoons of melted butter.
To assemble your popsicles, start by placing some of the blueberry mixture into each popsicle mold. Then add the cream cheese mixture until each mold is almost full. Finally, top each one with the crushed cookie mixture. Be sure to add the popsicle sticks before you place them in the freezer!
Allow to freeze for at least 6 hours.
To serve, you may need to run warm water over the popsicle molds to make it easier to remove the popsicles.
Enjoy!